


PERSONALIZED-PRODUCT M2
To change the Area of Thumbnail. Go to Admin > Store > Configuration > Personalized Products > Image Setting > Thumbnail Height and Width Now, Add the Height and Width of the thumbnail (In Numbers) Save the Configuration.
To upload a clipart on personalized product can add Clip arts from a pre-populated clipart gallery. You should go to the Admin Panel first to allow the personalization of the clipart. Go to Admin > Personalize Product > Image and Clipart Setting

Now, Save the configuration and go to the frontend You can add clipart by clicking Clipart tab Select the required clipart

You can change the position of the clipart you can also Rotate and Re-position
To Add Clipart Image you should follow these steps:- Admin > Milople Extension > Manage Clipart Image

Now , to Add New Image click on the (Add New Image) button

After clicking on Add New image you will see a new page for Adding New Image Information (General Information) Fill the Fields (Name , Status) Browse and select the image for clipart and upload it Click on Save image to save the image as clipart

Your Clipart Image is Ready
To Add Clipart Image follow these steps:- Admin > Milople Extension > Manage Clipart Category

You will have an option (Add New Category), click on it to Add New Category

After, clicking on Add New Category button you will have a New page Category Information On this page you will find two options 1. General 2. Image Click on General first Add Name Set the Status Enabled Now, Click on Save Category

Now, click on the Image displayed in the Category Information Box to Add Images Select the Images you want to Add in this Category After, selecting the images save the Category by clicking on Save Category button and exit

Your Clipart category is ready
Log in to your Admin account Go to Products -> Catalog

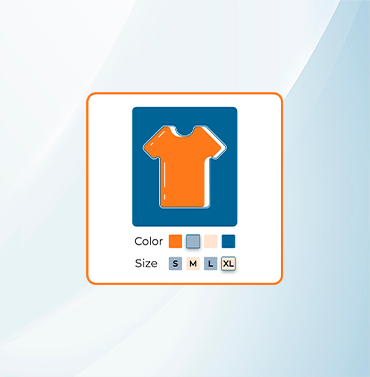
Select the Product from the grid on which you want to define the area Go to Image & Video section and click on it Once all the product images are loaded click on pencil button icon to select the area on that product image

A dialogue box will pop-up where you will be able to see the product image then drag and draw the area over the product image.

You can also add text styles and text effects if needed. After adding area Save the product image
To verify the personalization, customer should add the product to the cart where customer can see the product detail and can preview the product before checkout.
You can preview your product by clicking on PREVIEW in the cart and a pop-up image of your personalized product will appear.

After, previewing customer can check-out for further processes
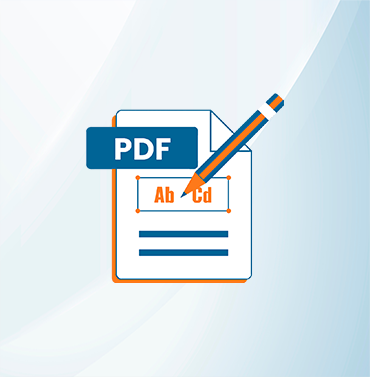
To create a template on the product image, you will need to first draw an area over the product image Please refer How to define area on product for this Once you draw the area, you can add multiple texts as template that can be moved by the customer. The position will be predefined by the admin To add template text, please enter text in Place Holder textbox and enter number of characters that need to be allowed on frontend (in numbers)

Click on Add Name and it will be placed on product image within the area Admin can move and set the position and can also change the styles, effect by selecting the text object After adding text click on Save button to save the template and area
Log in to your Admin account Go to Products -> Catalog Select Product from grid in which you want to draw the area Go to Image & Video section and click on it A pop up dialogue box will appear where you will be able to see the product image At the footer of that dialogue box you will be able to see Delete button Click on it in order to remove the template. Note: Area will be removed if you delete the template.
User will be able see the preview on the cart page and inside the order page of customer’s My Account

At the backend under Sale > Order of customer, you can preview and download the images
No, you need NOT purchase any other license for your test server. We will provide a test license key for it. You can buy our extension with your production domain name
Yes, our extension supports almost all themes out there in the market but sometimes due to some highly customized theme in which the theme developer has changed the default Magento flow and layout, it requires some adjustment according to your theme. You can refer our extension help doc for installation or else you can hire us
Log in to your Admin account Go to Products -> Catalog Select Product from the grid in which you want to delete the area Go to the Image & Video section and click on it A dialogue box will pop-up where you will able to see the product image On the bottom of the dialogue box you will be able to see the Delete button, click on it to remove the area Note: Template will be also removed if you delete the area.
First enable the text from the backend To enable text follow these steps: - Go to Admin > Text Setting > Allow Personalization with Text Select Yes to enable it (as shown below)
Save the configuration Now go to the frontend and you can now personalize text as you want Enter the text and click Add Text.

You can change all the text formatting like type, color, size and many more. You can even rotate, reposition and delete them as per your needs. You can also change the effects of the text with the help of text effect option given below the text style. Ex: - Curve, bulge, arc, large, small etc.

To enable Price per Text feature the user should go to the Admin > Text Setting > Price Per Text > and should fill the price for the single text in the area

The Price per Text provides the user to add text and it will cost as defined by the admin.
To add more fonts the user has to go to Admin > Text Setting > Allow Text Formatting for Google Fonts Select Yes to
enable Google fonts
If the Admin selects the Google Fonts, they will also beavailable at the frontend

Sometimes it’s necessary to show the messages in the note section to alert the customer. Here are some steps to enable the note Go to Admin > Personalized Product > General Setting There you can find Enable Note for Personalized Products Select Yes to enable it

By, selecting Yes, you will be able to see a writing area

Here you can enter the message and it will be shown at the frontend (as shown in the image) After writing the note Save the configuration And now you can see the message at the frontend

To upload an image on the personalized product, you should enable the personalization with image at the backend following these steps:-
Go to the Admin > Personalized products > Image setting > Allow the Personalization with Image
Select Yes
And Save the configuration
Personalization with Image is enabled

After saving, go to Frontend and you can upload an image of your choice

To enable price per image you must follow these steps: - Go to Admin > Image Setting > Price Per Image set the price Save the configuration

To Add Custom Fonts follow these steps:- Admin > Milople Extension > Manage Fonts

You will have an option (Add Font), click on it to add new font

After clicking on Add font you will see a new page for Adding Font information Fill the Fields (Font name , status) Browse and select the font file of .TTF or .WOFF type Upload it and click on Save Fonts to save the font

To personalize, login to the backend and then go to Admin > Personalized Products > Personalized Area Setting and set width and height of the canvas as per the need Save the configuration

Now go to the frontend and check.
Validate your login
Sign In
Create New Account