


PARTIAL-PAYMENT M2
To change the brand label: Go to ‘Admin > General Setting > Partial Payment Brand Label’. Now set the brand label as per your choice.
 ‘Save’ the configur
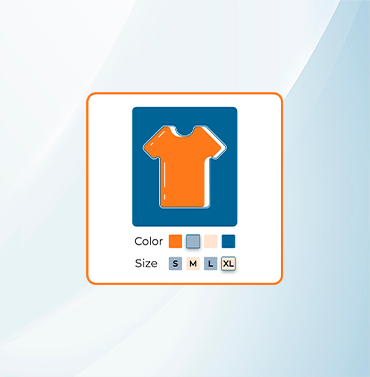
To set the partial payment to specific product only:
Step - 1:
Go to‘Admin panel > Store > Configuration > Partial Payment > General Setting > Apply Partial Payment To’
and choose Selected products only (only selected products will have the instalment option) then‘save’
configuration.
Step - 2:
Open Specific Product from'Products > Catalog'
and set the option for'Apply Partial Payment'
to'Yes'
from 'Partial Payment' tab. Then, ‘Save’ the configuration.
To set Partial Payment mandatory for Specific Products Only Open Specific Product from 'Products -> Catalog' and set the option for ‘Allow Partial Payment’ to ‘No’ from ‘Partial Payment’ tab. ‘Save’ configuration. Note: This configuration will be in effect if Apply Partial Payment is set to 'Selected products only'.
To set the Down Payment as fixed or as a percentage amount for product: Go to ‘Admin > Product > Catalog > Choose the
Product > Partial Payment > Calculate Down Payment’ set the option 'Fixed' or 'Percentage' of product price (as
shown below).
Note: This configuration will be in effect if Apply Partial Payment is set to 'Selected products
only’.
A Wholecart is an option for the customer to apply the partial payment option to all the products in cart. This eliminates the need to apply partial payment for individual products. In whole cart down, payment and remaining amount will be directly calculated on the 'subtotal'.
Go to
‘Admin panel > Store > Configuration > Partial Payment > Apply Partial Payment To’
and choose option Whole cart then‘Save’
the configuration.
The Partial Payment feature will be available only if the Subtotal is greater than Minimum Order Amount. Keep Blank or Set Zero if you don't want to set Minimum Order Amount to avail partial payment facility.
Go to ‘Admin Panel > Store > Configuration > Partial Payment > Allow Full Payment’
And then select the option ‘NO’ to enable the full payment and ‘Save’ the configuration.
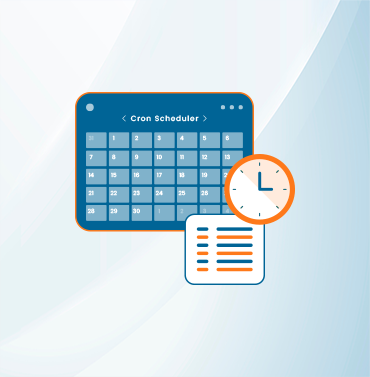
To set the payment plan to monthly, weekly: Go to ‘Admin panel > Store > Configuration > Partial Payment > Payment Calculation Settings’. Now, select ‘Payment Plan’ (as shown in the image) and ‘Save’ the configuration.
To set Payment plan for custom day intervals you must: Go to the ‘Admin panel > GStore > Configuration > Partial
Payment > Payment Calculation Settings’.
Select the
option ‘Based on Days’.
Enter the ‘Number of Days’ for ex:- 2,3,4 etc. ( Single Digit)
Now ‘Save’ the configuration.
To set the maximum credit limit: Go to ‘Admin Panel > Store > Configuration > Partial Payment > Partial Payment Credit Setting > Maximum Credit Limit’. Set the ‘Credit Limit Amount’ to any numeric value. ‘Save’ the configuration.
The credit limit surpass message field is to set an alert for the customer that the purchase amount for the products which he/she has chosen to buy via Partial Payment has surpassed or exceeded the credit limit.
To set credit limit surpass message just follow these steps:-
Go to ‘Admin Panel > Store > Configuration > Partial Payment > Partial Payment Credit Setting > Credit Limit Surpass Message’
Write your message in the box given for writing message
- For ex:- Sorry, you have surpassed your partial payment credit limit.
- The term ‘Credit limit’ will automatically be replaced by the value given in the Maximum Credit Limit.
‘Save’ the configuration.
The sender can be chosen by following this path, ‘Admin Panel > Stores > Configuration > Partial Payment > E-mail and Notification Settings > Choose e-mail Sender’.

Admin can set multiple receivers of the email through these steps: To activate CC (carbon copy) for email follow
these steps: ‘Admin Panel > Stores > Configuration > Partial Payment tab > E-mails and Notification Setting > Email
CC to’.
More Receivers can also be added by adding more email IDs like 'abc@gmail.com, xyz@gmail.com'.
Admin can decide who will be the receiver of Partial Payment order confirmation email by changing the settings from: ‘Admin Panel > Stores > Configuration > Email and Notification Setting > Send Partially Paid Orders' Confirmation Email ‘.
1. To customer (Only the customer will get the email).
2. To customer and CC (Both Customer and cc will get the email).
3. None ( No one will get the email).
Instalment reminder email will be sent before 2 days of the instalment due date.
Example: If due date of installment is '5-1-2017' then the reminder will be sent on '3-1-2017'.
Admin can decide the receiver of Email instalment reminder by changing the settings from: ‘Admin Panel > Stores > Configuration > Email and Notification Setting > Send Instalment Reminder Email’.
1. To customer (Only the customer will get the email).
2. To customer and CC (Both Customer and cc will get the email).
3. None (No one will get the email).

Admin can decide who will be the receiver of Payment Confirmation Email by changing the settings from: ‘Admin Panel > Stores > Configuration > Email and Notification Setting > Send Installment Payment Confirmation Email’.
1. To customer (Only the customer will get the email).
2. To customer and CC (Both Customer and cc will get the email).
3. None (No one will get the email).
Admin can decide who will be the receiver of Installment Failure Email by changing the settings from: ‘Admin Panel > Stores > Configuration > Email and Notification Setting > Send Installment Failure Email’.
1. To customer (Only the customer will get the email).
2. To customer and CC (Both Customer and cc will get the email).
3. None (No one will get the email).
If a customer forgets to pay his/her installment before the due date then:
Maximum 3 notice emails will be sent at an interval of every 2 days after installment due date.
For ex:-
1st overdue email to be sent on '1-1-2017'.
2nd overdue email to be sent on '3-1-2017'.
3rd overdue email to be sent on '5-1-2017'.
Admin can decide who will be the receiver of Instalment overdue notice email by changing the settings from: ‘Admin Panel > Stores > Configuration > Email and Notification Setting > Send Installment Over Due Notice Email’ .
1. To customer (Only the customer will get the email).
2. To customer and CC (Both Customer and the cc will get the email).
3. None ( No one will get the email).

To change/modify the template for the Partial Payment Installment confirmation email by editing:
Find the 'partialpayment_order_confirmation.html' file that is located at ‘app/code/Milople/Partial_payment/view/frontend/email' directory.
To change or modify the template for the Partial Payment Installment Reminder Email by editing
‘partialpayment_installment_reminder.html’ file is located at ‘app/code/Milople/Partialpayment/view/frontend/email’ directory.
To change or modify the template for the Partial Payment Installment Payment Confirmation Email by editing
‘partialpayment_installment_confirmation.html’ file is located at ‘app/code/ Milople/Partialpayment/view/frontend/email’ directory.
To change or modify the template for the Partial Payment Installment Failure Email by editing.
‘partialpayment_installment_failure.html’ file is located at ‘app/code/Milople/Partialpayment/view/frontend/email’ directory
To change or modify the template for the Partial Payment Installment over Due Notice Email by editing.
‘partialpayment_installment_overdue_notice.html’ file located at ‘app/code/Milople/Partialpayment/view/frontend/email’ directory.
Go to ‘Admin > General Setting > Partial Payment Available To’.
There you can find options such as: - NOT LOGGED IN, General, Wholesaler, and Retailer
You can select multiple options in the box for partial payments (as shown below).
Select the required options and then ‘Save’ the configuration.
Validate your login
Sign In
Create New Account